Want to know a new way to simplify your work with intricate die cuts? Today I share a quick and mess free technique for embellishing hand made cards.
Хотите узнать новый приём для работы с деликатными вырубками? Сегодня я показываю новую технику для украшения открыток ручной работы.
I am sharing a card made with a technique I have never tried before. I was happy with the result and will use it over Christmas period for sure to ease my card making process.
Сегодня я показываю открытку с техникой, которую пробую впервые. Поразительно, как простой приём может значительно облегчить работу с деликатными вырубками.
I used AGAIN for my card two full sets from Best Day exclusive release by Simon Says Stamp, namely stamps and dies set Even More Spring Flowers as well as Big Thanks Words stamps set and Big Thanks Steel Dies set.
Для этой открытки я СНОВА использовала два полных набора штампов и ножей из коллекции Best Day от американской компании Simon Says Stamp, а именно штампы и ножи Even More Spring Flowers, Big Thanks Words и ножи Big Thanks.
I started with masking off the upper right corner of my card panel and stamping a flower in watercolour resistant black ink.
В первую очередь я замаскировала верхний правый угол моей панели и сделала оттиск цветка водостойкими чернилами.
Then masked off the flower impression with a die cut mask and stamped down branches. I used watercolour markers ( SSS | AMZUS | BLIC ) and a fine water brush for colouring the impressions.
Затем закрыла оттиск цветка вырубленной маской и напечатала ветки. Для раскрашивания я использовала акварельные маркеры ( SSS | AMZUS | BLIC ) и кисть с резервуаром.
Die cut masks are always a bit bigger than the impression. I filled in blanks with a black permanent ink pen.
Вырубленные маски всегда несколько больше, чем оттиски, поэтому я дорисовала линии токим стойким маркером.
To finish off the panel I stamped the phrase from Big Thanks Words stamps set below the coloured image.
Чтобы закончить работу с панелью, я сделала оттиск фразы из набора Big Thanks Words ниже раскрашенного цветка.
В завершение работы я приклеила панель на основу открытки из чёрного кардстока жидким клеем, а позолоченную вырубку клеевыми микро-точками.
I am sharing this card to the following challenge galleries:
Simon Says Stamp Flickr Challenge #98 - Embossing
Simon Says Stamp Wednesday Challenge - Anything Goes
CAS Mix Up June 2018 - Layered embossing Powders
Craft Stamper Take It Make It June Challenge - Anything Goes
CAS on Friday #134 - Embossing
The Flower Challenge #21 - Use A Previous Challenge (Embossing July 2017)
and to Simon Brand Best Days Release Gallery.
Do you need more inspiration with Even More Spring Flowers set? Click the picture to hop over to my post about creating a floral frame.
Хотите ещё пример использования штампов Even More Spring Flowers? Жмите на фото для перехода к статье про создание объёмных цветочных рамок.
To learn a simple way to enhance die cuts, click the picture below.
Чтобы узнать простейший приём по работе с вырубками, нажмите на фото ниже.

Хотите узнать новый приём для работы с деликатными вырубками? Сегодня я показываю новую технику для украшения открыток ручной работы.
I am sharing a card made with a technique I have never tried before. I was happy with the result and will use it over Christmas period for sure to ease my card making process.
Сегодня я показываю открытку с техникой, которую пробую впервые. Поразительно, как простой приём может значительно облегчить работу с деликатными вырубками.
I used AGAIN for my card two full sets from Best Day exclusive release by Simon Says Stamp, namely stamps and dies set Even More Spring Flowers as well as Big Thanks Words stamps set and Big Thanks Steel Dies set.
Для этой открытки я СНОВА использовала два полных набора штампов и ножей из коллекции Best Day от американской компании Simon Says Stamp, а именно штампы и ножи Even More Spring Flowers, Big Thanks Words и ножи Big Thanks.
I started with masking off the upper right corner of my card panel and stamping a flower in watercolour resistant black ink.
В первую очередь я замаскировала верхний правый угол моей панели и сделала оттиск цветка водостойкими чернилами.
Then masked off the flower impression with a die cut mask and stamped down branches. I used watercolour markers ( SSS | AMZUS | BLIC ) and a fine water brush for colouring the impressions.
Затем закрыла оттиск цветка вырубленной маской и напечатала ветки. Для раскрашивания я использовала акварельные маркеры ( SSS | AMZUS | BLIC ) и кисть с резервуаром.
Die cut masks are always a bit bigger than the impression. I filled in blanks with a black permanent ink pen.
Вырубленные маски всегда несколько больше, чем оттиски, поэтому я дорисовала линии токим стойким маркером.
To finish off the panel I stamped the phrase from Big Thanks Words stamps set below the coloured image.
Чтобы закончить работу с панелью, я сделала оттиск фразы из набора Big Thanks Words ниже раскрашенного цветка.
To Make Multiple Layer Heat Embossed Die Cut:
- I die cut a word Thanks with a steel die from Big Thanks set from a white card stock
- Then inked it with embossing ink and covered completely with a bright pink glitter embossing powder ( SSS | AMZUS ) and melted the powder with a heat gun.
- When the die cut has cooled off, I inked it repeatedly and again heat embossed with the same powder.
- This second layer of powder gave a solid colour coverage to my die cut and made it look dimensional.
- With an embossing pen I added a few lines to the die cut and seasoned it with the coarse embossing enamel ( SSS | AMZUS ).
- This third layer added gorgeous gold accents to the die cut.
Как сделать многослойное горячее тиснение?
- Из белого кардстока сделать вырубку ножом из набора Big Thanks
- Затем подушкой чернил для эмбоссинга нанести чернила на вырубку, полностью засыпать её ярко-розовой пудрой с блёстками ( SSS | AMZUS ) и запечь феном.
- Когда первый слой затвердеет, повторить операцию
- Чтобы добавить цветовые акценты и сделать вырубку ещё более выпуклой, нанести ручкой для эмбоссинга чернила в некоторых местах и присыпать вырубку грубой эмалью ( SSS | AMZUS ), а затем запечь её.
В завершение работы я приклеила панель на основу открытки из чёрного кардстока жидким клеем, а позолоченную вырубку клеевыми микро-точками.
Four Reasons I Liked Multiple Layer Heat Embossing Technique
- This technique enhances various types of delicate die cuts, such as words, flowers, snowflakes and doilies.
- It is a mess-free way to build dimension for any die cut without stacking up several layers, no sticky fingers!
- I put into use two of my coloured glittered embossing powders and will try other powders combinations.
- This multi layer heat embossed die cut is beautiful enough to skip other embellishments for my Clean and Simple card.
4 Преимущества многослойного горячего тиснения
- С помощью этой техники можно украсить деликатные вырубки разным форм, не только слова, но и цветы, снежинки или кружева.
- Честно, не люблю возиться с клеем и выравниванием нескольких вырубок для объёма. Даже 2 слоя пудры делают вырубку довольно выпуклой.
- Наконец я попробовала несколько цветных пудр, и собираюсь поэкспериментировать с другими.
- Красивая вырубка позволила избежать излишнего для КАС открытки украшения.
I am sharing this card to the following challenge galleries:
Simon Says Stamp Flickr Challenge #98 - Embossing
Simon Says Stamp Wednesday Challenge - Anything Goes
CAS Mix Up June 2018 - Layered embossing Powders
Craft Stamper Take It Make It June Challenge - Anything Goes
CAS on Friday #134 - Embossing
The Flower Challenge #21 - Use A Previous Challenge (Embossing July 2017)
and to Simon Brand Best Days Release Gallery.
Do you need more inspiration with Even More Spring Flowers set? Click the picture to hop over to my post about creating a floral frame.
Хотите ещё пример использования штампов Even More Spring Flowers? Жмите на фото для перехода к статье про создание объёмных цветочных рамок.
To learn a simple way to enhance die cuts, click the picture below.
Чтобы узнать простейший приём по работе с вырубками, нажмите на фото ниже.

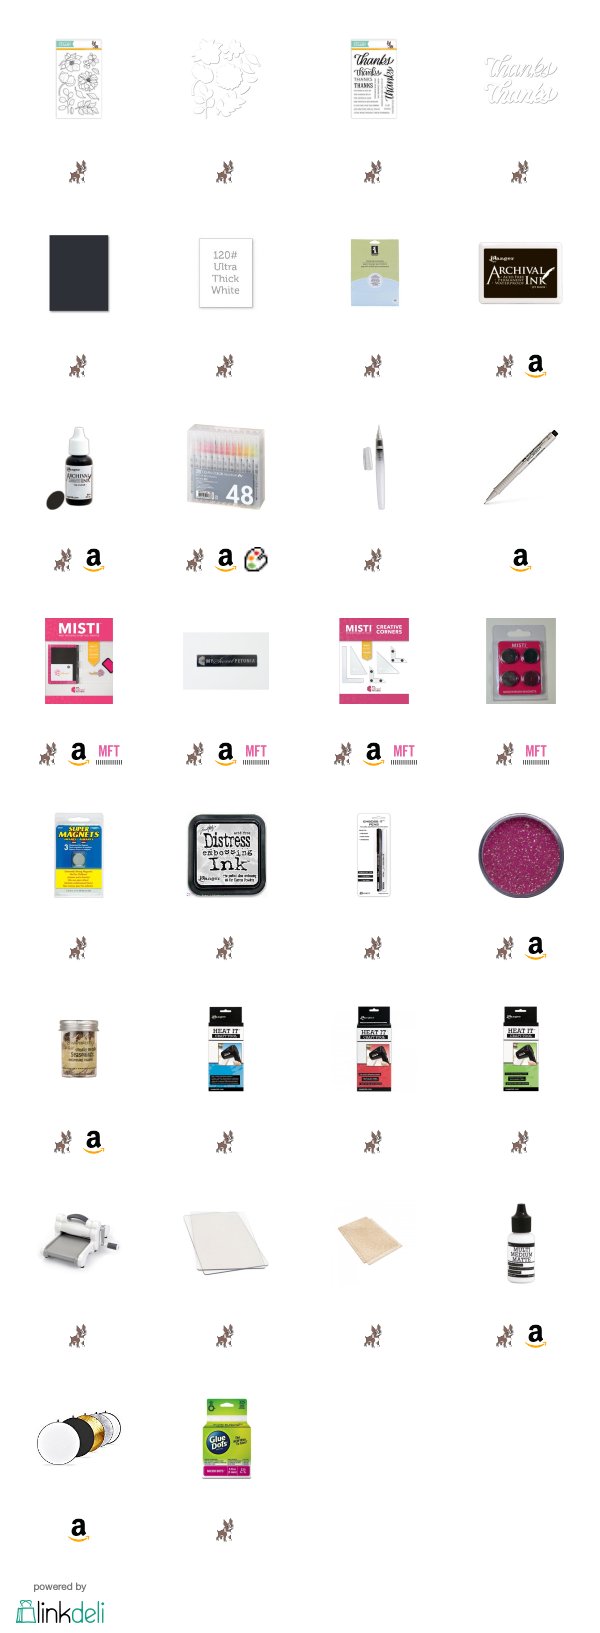
Supplies Used
Compensated affiliate links used. I personally have bought all the below displayed products. This post was not paid or sponsored.
Click on the icons below to go to your preferred online store. If you buy any of these products following my link, I will receive a small commission at no cost for you.


Ксения, очередной шедевр! Вдохновляюсь каждой работой.
ReplyDeleteWhat beautiful colors and shimmer you achieved on your lovely die cut thanks! Your flowers are masked and colored wonderfully in the corner and the stamped additional sentiment is lovely beneath your die cut! thank you for joining us in the CAS Mix Up Challenge! xx
ReplyDeleteSuch a cool way to use embossing. That sentiment (nearly) steals the show from your beautiful bloom.
ReplyDeleteBeautiful cards!
ReplyDeleteGorgeous card Ksenija! Gorgeous flower image and your colouring is AMAZING! Love the layered thanks die-cut ... so pretty! Thanks for sharing with us at CAS Mix Up!
ReplyDeleteThis card is simply gorgeous! Thanks so much for joining us at the Simon Says Stamp Wednesday Challenge :)
ReplyDeleteIt's a very beautiful card and the lovely tones you've achieved through embossing looks so pretty and gives a fabulous dimension and sparkle to your card x
ReplyDeleteA beautiful flower and the die cut looks like a piece of jewelry! Beautiful, Ksenija! Thanks so much for sharing with us at CAS Mix Up!
ReplyDeleteSuch a vibrant and beautiful card. Loving those colours and how you coloured the flower is stunning. Great layering of the embossing powders on your die cut and so pretty and so very effective. Thank you for joining in over at The CAS Mix Up Challenge x
ReplyDeleteBeautiful and colorful card, love the rich colors you used for your flower and the awesome, glitter layered sentiment.
ReplyDeleteThank you for sharing with us at THE FLOWER CHALLENGE, I hope you come and play again soon.
Hugs.
OMG, Ksenija...all your cards are absolutely Stunning. I so agree with your 4 reasons why you loved the Layered Embossing Powder technique on die cut images:-) A great way to use up EB powders and glitters that seem to multiply over the years too:-) Thank you again for sharing your beauties and descriptions. I am so pleased you joined us at CAS Mix Up. Love and Hugs..
ReplyDeleteWow ! Another amazing card. Your colouring is stunning and this layered embossed die cut gives such a beautiful dimension to the card. Fabulous as usual! x
ReplyDeleteSo glad you directed me to your blog amazing cards.The dimensionon the sentiments is exquisite.
ReplyDeleteBeautiful cards! Love it!
ReplyDeleteThank you for joining our challenge at Cas on Friday!
Mariken DT
I love this card, I think it is one of my favourites colour wise. You design so many beautiful creations but this one the colours just call to me. That die cut looks amazing in the layers with the different colours peaking thru. Thank you so much for joining us at The Flower Challenge and we hope to see you there again soon. Aileen DesignTeam
ReplyDeleteGorgeous card - I love how you've coloured your bloom! Thanks for playing along at Craft Stamper Take It, Make It!
ReplyDeleteBeautifully CAS, and the bloom looks amazing. Thanks for playing along with the Craft Stamper challenge xx
ReplyDeleteAbsolutely love this good luck and thanks for entering the Craft Stamper challenge xx
ReplyDeleteOh, sweet Ksenija, I've missed seeing your cards! But I saw your card on The Flower Challenge blog! I LOVE your work, and what a stunning card, sweet friend! I need to find your SCS gallery again. Hugs! xoxo
ReplyDelete