Would you like to know my 15 secretes to make clean and simple Valentine's Day cards looking cute and eye-catching?
How to make a clean and simple card grabbing viewers' attention? How to build a card around one single character? How to avoid cluttering your card?
ЛИНК для перехода к РУССКОЙ версии
I've heard many times that clean and simple cards are the hardest to make. We all want to create beautiful well-balanced cards and it is difficult not to overload a card with details.
Today I am sharing several cards for Valentine's Day. But the most exciting thing is that I used 15 tricks to make them sweet and eye-catching which I am going to tell you about now.
This is the second post about the cards I made with my RE-FRESHED STASH. If you are not my blog follower yet, probably, you have not seen THESE cards made with a gorgeous stamp Made-To-Be Watercoloured.
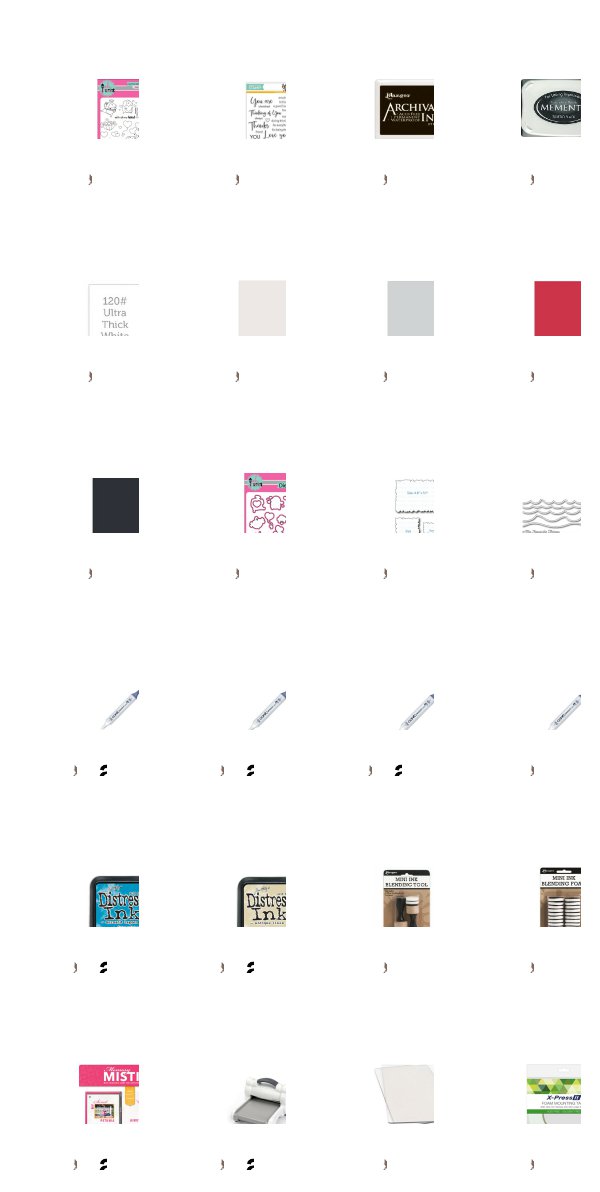
I made four Love cards made with Hedgehugs stamps and dies set from Pink&Main. Sentiments for each card come from one the best sentiments stamp sets I ever had - Thoughtful Messages from Simon Says Stamp. This set contains phrases expressing gratitude, love, encouragement and birthday greetings.
All images were stamped with Memento Dye Ink down to white cardstock and coloured with Copic Sketch markers. I've spent some time to find a combination of Copics to create a prickly look of hedgehogs. I hope I found it.
I finally got my hands on wonderful Ripped Rectangles steel dies, that come in three sizes suitable for small and bigger images stamping. I like the torn edges these dies create and possibility to stack layers to add more dimension to a simple card.
The panels with images and sentiments are popped up with a foam tape. I find it pretty to combine script parts of the sentiments stamped to panels with typed parts heat embossed on stripes of bright or black card stock and also raised with foam tape pieces.
I used a double layer of foam tape to raise the heart-shaped balloon for extra dimension.
For these both cards I used off-white card base to make the panels stand out, while for the next two - soft gray card stock.
The background masking and ink blending techniques helped me to build a perspective on these two cards.
I used only script parts of the sentiments from Thoughtful Messages stamps set and stamped them down to the card bases in black archival ink for super crisp lines.
The layout of this card follows the direction of the hedgehog's movement. I bet, your eyes are going from the lower left cornet to the upper right with ease.
To complete these cards I cut my own paper masks with Ocean Waves steel dies. Firstly, I covered the lower part of the panel and sponged Mermaid Lagoon Distress ink with Mini Blending Tool, then removed it, applied the upper part of the mask and blended Antique Linen ink.
Mermaid Lagoon is my favourite ink shade now to create the background. HERE and HERE you can see other examples of backgrounds made with it.
A combination of two ink shades blended with masks adds a depth to a clean and simple card. Additionally, I "broke" an image visually by stamping three hearts directly to the panel, while two are die cut and raised with a foam tape.
If you are my first-time reader and you enjoyed this post and the cards, please follow my blog. In the coming days I will share the bright cards made with Altenew stamps from my refreshed stash.


How to make a clean and simple card grabbing viewers' attention? How to build a card around one single character? How to avoid cluttering your card?
ЛИНК для перехода к РУССКОЙ версии
I've heard many times that clean and simple cards are the hardest to make. We all want to create beautiful well-balanced cards and it is difficult not to overload a card with details.
Today I am sharing several cards for Valentine's Day. But the most exciting thing is that I used 15 tricks to make them sweet and eye-catching which I am going to tell you about now.
This is the second post about the cards I made with my RE-FRESHED STASH. If you are not my blog follower yet, probably, you have not seen THESE cards made with a gorgeous stamp Made-To-Be Watercoloured.
All images were stamped with Memento Dye Ink down to white cardstock and coloured with Copic Sketch markers. I've spent some time to find a combination of Copics to create a prickly look of hedgehogs. I hope I found it.
I finally got my hands on wonderful Ripped Rectangles steel dies, that come in three sizes suitable for small and bigger images stamping. I like the torn edges these dies create and possibility to stack layers to add more dimension to a simple card.
The panels with images and sentiments are popped up with a foam tape. I find it pretty to combine script parts of the sentiments stamped to panels with typed parts heat embossed on stripes of bright or black card stock and also raised with foam tape pieces.
I used a double layer of foam tape to raise the heart-shaped balloon for extra dimension.
The background masking and ink blending techniques helped me to build a perspective on these two cards.
I used only script parts of the sentiments from Thoughtful Messages stamps set and stamped them down to the card bases in black archival ink for super crisp lines.
To complete these cards I cut my own paper masks with Ocean Waves steel dies. Firstly, I covered the lower part of the panel and sponged Mermaid Lagoon Distress ink with Mini Blending Tool, then removed it, applied the upper part of the mask and blended Antique Linen ink.
Mermaid Lagoon is my favourite ink shade now to create the background. HERE and HERE you can see other examples of backgrounds made with it.
I use only one saturated colour on this card - dark red to grab attention and avoid colour clutter.
Tips on colouring hedgehogs with Copic markers:
To wrap-up the main points on how to make a charming card and keep it clean and simple:- Use one image to focus on
- Choose adorable characters to create the main mood
- Adhere a white card panel to a soft-toned card base to make it stand out
- Use the brightest or darkest colour only to small details (elements of a stamped image or small sentiments banners)
- Add interest with unusual panel (mat) shape
- But avoid too much lines, texture or shapes (for example wonky stitching)
- Build a perspective without layers of paper by shading and masking
- Use complementary colours for ink blending to make the focal image pop up
- Spice up the card by combination of script and typed fonts
- Pop the typed parts of sentiments up with a foam tape to spotlight the main idea of your message
- Raise the focal image with a layer of foam tape, make it double for cute details.
- Find parts of a stamp which can be stamped directly to card base to add dimension
- Think creatively about the card layout, follow the movement direction of the focal image
- Avoid colours clutter by using a limited palette
- Stamp the sentiment with black archival ink for crisp lines
Are you going to use any of 15 tips on making adorable cards and keeping them clean and simple? You are welcome to grab and pin this post to Pinterest not to forget them.
Hover over photos and click on the Pin button to save to Pinterest or use floating Share buttons on the left side of the screen for desktops or top of the screen for mobile devices. Click HERE to follow the board with my best cards - Best of Sweet Kobylkin.


I love your cards and your 15 tips are terrific! Thank you!
ReplyDeleteWOW, your four cards are the cutest ever ! Beautifully coloured and so CAS, I love them all ! This hedgehogs stamp set is adorable and you showcase it to perfection. Love your soft but so effective backgrounds. Thanks for the 15 tips that I'm going to print to keep in mind ! Another amazing post. Thanks for sharing and for inspiring ! Hugs & bises x
ReplyDeleteI have this stamp set, but not the other sentiments you used. LOVE the cards!
ReplyDeleteThank you for all of the tips to make CAS cards! I admire your style and always look forward to seeing your new creations!
ReplyDelete