
Всем привет в 4-ый день СП Адвент Календарь со Sweet Kobylkin!
Hello Everyone on Day 4 of my Advent Calendar Blog Party!
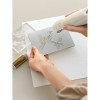
 Вот и новый листик Адвент календаря готов:
A new page of my Advent Calendar is ready:
 И крупным планом:
And close-ups:

 Вкратце рецепт изготовления:
A short description of the process:
А вас ждут два приза - 1 бесплатное место для обучения на новом курсе в Clean and Simple School - до 9 ноября
Two prizes are waiting for lucky persons. 1 free spot to online class at Clean and Simple School - to be drawn on 11/9
 и набор штампов из недавнего релиза компании My Favorite Things - до 30 ноября.
and My Favorite Things stamp set released recently - until 11/30.
 ЛИНКИ и ПРАВИЛА / LINKS and GUIDELINES
3 День / DAY 3
5 День / DAY 5

Желаю всем вдохновения и хорошей погоды! Спасибо, что заглянули!
I wish you inspiration and a sunny weather! Thank you for visiting!

Hello Everyone on Day 4 of my Advent Calendar Blog Party!

A new page of my Advent Calendar is ready:

And close-ups:


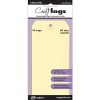
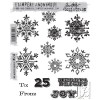
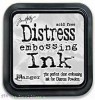
- Напечатайте снежинки из набора Mini Weathered Winter чернилами для эмбоссинга на тег из кардстока Manila и нанесите тонкую белую пудру для эмбоссинга, запеките.
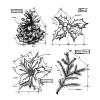
- В центре тега напечатайте пуансеттию чернилами Jet Black Archival.
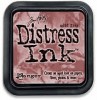
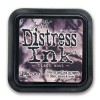
- Нанесите Barn Door и Aged Mahogany Distress ink на тег прямо подушечками и распылите воду до смешения чернил. Оставьте сохнуть
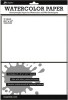
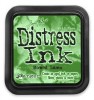
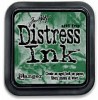
- Сделайте два оттиска пуансеттии чернилами Jet Black Archival на акварельной бумаге. Один оттиск раскрасьте путем прямого нанесения чернил Barn Door и Aged Mahogany Distress ink, а второй - Mowed Lawn и Pine Needles Distress ink и щедро распылите воду до смешения чернил. Оставьте сохнуть.
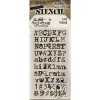
- На сухой уже тег нанесите чернила Black Soot Distress ink через трафареты Argyle и Typo Layering stencils с помощью спонжа.
- Слегка затонируйте края тега спонжем с чернилами Black Soot Distress ink
- Вырежете 2 цветка пуансеттии - большой зеленый и малый красный только с центральными листьями
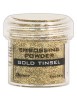
- Края красных листьев обмакните в чернила для эмбоссинга и золотую пудру, запеките пудру.
- Для сборки используйте вспененный скотч. В центр цветка нанесите золотый блестки.
A short description of the process:
- Take a Manila cardstock tag. Ink snowflakes stamps from the Mini Weathered Winter set in embossing ink and stamp down, cover with fine white embossing powder and heat set.
- Stamp the poinsettia stamp from Christmas Blueprints down to the tag in Jet Black Archival ink.
- Apply Barn Door and Aged Mahogany Distress inks directly with ink pads to a a tag and spray with clear water and let it air dry.
- Stamp the poinsettia down twice to watercolour paper in Jet Black Archival ink. Apply Mowed Lawn and Pine Needles Distress inks directly with ink pads to one stamped image, and Barn Door and Aged Mahogany Distress inks - to the other. Spray both images heavily with clear water and let them air dry.
- Stencil Black Soot Distress ink with a blending tool through Argyle and Typo Layering stencils to different areas of the tag.
- Distress lightly the edges of the tag with Black Soot Distress ink using a blending tool.
- Fussy cut poinsettia twice, one - a complete image, and the second - just center red leaves.
- Apply embossing ink directly with ink pad to the edges of the red leaves and dip them into gold embossing powder and heat set.
- Assemble the flower by adhering layers of leaves with a foam tape. Add a few dots of gold stickles to the center of the flower.
А вас ждут два приза - 1 бесплатное место для обучения на новом курсе в Clean and Simple School - до 9 ноября
Two prizes are waiting for lucky persons. 1 free spot to online class at Clean and Simple School - to be drawn on 11/9
and My Favorite Things stamp set released recently - until 11/30.
3 День / DAY 3
5 День / DAY 5

Желаю всем вдохновения и хорошей погоды! Спасибо, что заглянули!
I wish you inspiration and a sunny weather! Thank you for visiting!


какой крутой!!!!!!! Все, буду лифтить!!!! :)))))))) а скажи прикольно так просто наносить все подушечкой, и сочно и быстро ;)
ReplyDeleteWork of art! In awe...
ReplyDelete~c
I am so inspired by all the beautiful creations on your blog!
ReplyDeleteThank you Linda! Join us for Advent Calendar Party ;)
DeleteКРУТО! И спасибо за инструкцию)))) Обязательно попробую!
ReplyDelete