Some stamp sets contain beautiful single stamps good for making a focal image on the card. Having made a several cards with a single image we often get tired of such stamps. How to extend usage of single stamps? I suggest creating a card with a fancy border without using a border die.
Yesterday I published this tutorial in Russian over at Sovushka Slavia blog, and today I translate it for my English speaking readers.
Choose a single midsize stamp with a matching die. I am using a peach stamp from Papertrey Ink set Be Mine, Valentine. It is better to use a frame die, not a solid one.
Measure first how many images can fit your card. I am using a top folding card base sized 5 1/2" by 4 1/4". It fits four peaches slightly overlapping along the 5 1/2" edge of the card.
Mark the middle of the card with a pencil at 2 3/4" and stamp peaches - at the far left corner and to the right of the middle mark.
Die cut two peaches from a piece of the same cardstock and stamp the image down to them.
I used Limeade Ice and Simply Chartreuse for leaves, and Orange Zest and Berry Sorbet for fruits stamping.
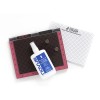
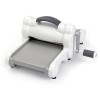
Make a horizontal guideline with a pencil at app. 3/4" from the edge of the card. Align a frame die with the stamped image and secure it with washi tape pieces. Make a sandwich for a die cutting machine by placing between cutting pads ONLY the lower 3/4" part of your card. Align the lower and the upper pads with your pencil guideline, secure pads washi tape pieces and die cut.
Using a craft knife make two cuts along the horizontal guideline.
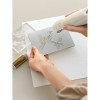
While your card is a one layered, stamp a sentiment. I combine this set with a sentiment from Fresh Floral Wrap Ups by Papertrey Ink. Behind the camera I die cut a tiny tag from a piece of a black cardstock and heat embossed in white a matching sentiment from the same set.
To assemble the card I used a foam tape to adhere the die cut peaches and a liquid adhesive to glue the tiny tag to the second peach.
Here is the result. I made a fancy border without a border die only using a single image and a matching die. My card has an eye pleasing layout with all images concentrated at the lower 1/3 of the space. I added a bit of dimension by popping up some of the fruits with a foam tape. A tiny black tag is attracting attention to the fruit at the intersection of vertical and horizontal visual lines app. at 1/3 of the card.
Do you find this tutorial comprehensive and inspiring?




Love your card and the border. Thanks for the inspiring tutorial, I love to learn more. I will be following your blog.
ReplyDeleteThank you, Barbara! And welcome to my blog ;)
DeleteKsenija, even without dies you can achieve this effect by fussy cutting around your images. Check this out
ReplyDeletehttp://rieslingmama.blogspot.de/2013/06/patriotic-birthday-take-one-cfc-casos.html