Showing posts with label CAS. Show all posts

Thursday, March 8, 2018

Card Video: Stamp Made To Be Watercoloured | Joy Clair

You enjoy watercolouring hand made cards, but are not feeling very confident with liquid paints. This simple technique will help you to make an amazing card.
Resist Technique Video Tutorial
Если вы любите раскрашивать открытки акварелью, но ещё не уверенны в своих навыках, это самая подходящая техника для создания потрясающей открытки.

Wednesday, February 7, 2018

15 Секретов Броских Валентинок В Стиле КАС

Хотите узнать 15 моих секретов, как сделать милые притягивающие внимание открытки-Валентинки в стиле Чисто и Просто?
Как вообще КАСовая открытка может привлечь к себе внимание зрителя? Но при этом не перегрузить открытку деталями, цветами и формами?

15 Secrets of Simple Eye-catching Valentine's Day Cards

Would you like to know my 15 secretes to make clean and simple Valentine's Day cards looking cute and eye-catching?
Use the brightest colour to highlight small details
How to make a clean and simple card grabbing viewers' attention? How to build a card around one single character? How to avoid cluttering your card?

Wednesday, January 24, 2018

Ever-Green Technique for Clean And Simple Cards

You enjoy colouring images with Copics or ZIGs markers, but you are often puzzled how to make pretty cards with them. How to get a finished look without adding layers of card stock? Does simply blended background seem boring for you? Do you have enough of steel dies to finish the layout, e.g. to create a mountain landscape? Do you want to know the cheapest and ever-green way to complete your card and keep it Clean and Simple (CAS)?
Simple Way To Create Pretty Background for Cards
Любите раскрашивать зверьков и милых персонажей, а потом ломаете голову, куда их пристроить? Как с ними сделать открытку? Какой фон подойдёт лучше всего? Простое тонирование дистресс чернилами уже надоело? Мало ножей для вырубки для пейзажа на фоне? Рассказываю про простейший способ создания фона для открыток в стиле Чисто и Просто.

Monday, August 7, 2017

On-The-Edge Die Cutting For One-Layer Cards

Hello Everyone!
Всем привет!
I am here today showing three tasty cards with On the Edge Die Cutting Technique for one-layer cards. To demonstrate this technique I used Funny Food stamp set by Simon Says Stamp.

Сегодня я показываю три однослойные открытки, исполненные в технике вырубки по краю. Для всех трёх открыток я выбрала набор штампов с координирующими ножами Funny Food от американской компании Simon Says Stamp.
On The edge die Cutting for One-Layer Cards
The first card is really easy to create. I stamped down watermelon slices in archival ink and draw with a pencil a vertical line 1 cm away from the edge. I partially die cut melons to the right from the pencil line, and then cut between the slices along the line.

Первая открытка самая простая в исполнении. Я сделала оттиски долек арбуза вдоль внешнего края открытки, а затем провела вертикальную черту на расстоянии примерно 1 см от края. Частично вырубила дольки координирующим ножом, зажимая между пластинами машинки только бумагу справа от линии. Затем ножом для бумаги отрезала поле между дольками.
On The edge die Cutting for One-Layer Cards
The images are coloured with ZIG Clean Color Real Brush markers, and the seeds are heat embossed.
Дольки раскрасила акварельными маркерами ZIG Clean Color Real Brush, а семечки - заэмбосила.

For the second card I used a doughnut stamp from the same set.
Для второй открытки я использовала пончики из того же набора.
On The edge die Cutting for One-Layer Cards
I made this card horizontal. First drew a line where the card base should be folded, then stamped down doughnuts and partially die cut them above the pencil line. Scored the card base along the line between the images and folded the card. This makes the doughnuts hang off the card and visually pop up.

Это открытка горизонтальная. Сначала я наметила простым карандашом линию сгиба открытки. После этого сделала оттиски пончиков и частично их вырубила с помощью координирующего ножа выше линии сгиба. Затем сделала биговку для сгиба только между изображениями. Пончики как бы выскакивают, открытка выглядит объёмной, оставаясь однослойной.
Funny Food Simon Says Stamp - Doughnuts close up
All three doughnuts are coloured with ZIG Clean Color Real Brush markers and embossed with chunky enamel.
Пончики также раскрасила акварельными маркерами ZIG Clean Color Real Brush и украсила грубой белой эмалью для имитации сахара.

The third card combines On the Edge Die Cutting  and Masking Techniques.
Третья открытка выполнена с дополнительным использованием масок при штамповке изображений. По сути эта открытка похожа на первую, но изображения наслаиваются.
3 Ways To Die Cut on The Edge of  One-Layer Cards
The idea is similar to the watermelon card, but I used masks to allow impressions to overlap. This card is also coloured with ZIG Clean Color Real Brush markers and embossed with ZING! powder.
How To Die Cut on The Edge of  One-Layer Cards
I am also sharing my watermelon card at:
Я также показываю арбузную открытку в чб:
CASology - Week 260 - Juicy/ Сочно
Less Is More #340 - Tropical Fruits/ Тропические фрукты
My doughnuts card I share at:
Я также показываю пончики в чб:
Addicted to CAS #117 - One Layer Card/ Однослой


Thanks for stopping by! Have a nice start of the week!
Спасибо, что заглянули! Желаю всем отличного начала недели!
post signature

Monday, July 24, 2017

Masking a Scene - Three Cards

Hello Everyone!
Всем привет!
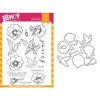
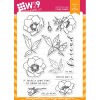
I am here today showing three joyful cards with Masking Technique. I used the recently released stamps sets by WPlus9. This is an easy way to create a fun scene and combine two different stamp sets.

Сегодня я показываю 3 открытки с применением техники маскировки. Для работы я использовала недавно выпущенные наборы штампов и ножей от американской компании WPlus9. Я покажу, как создать милую сценку и совместить несколько наборов штампов в одной работе.Masking a Scene - Little Dreamers WPlus9
To create these cards I started with pieces of 4 1/4" x 5 3/4" white card stock and traced with a pencil 3/4" wide area to be masked off later. Then stamped the Moon in Memento TUXEDO BLACK ( SSS | AMZUS ) and covered it with a mask die cut with a matching die from Inkadinkado STAMPING MASK PAPER ( SSS | AMZUS | AMZUS ). I continued with stamping clouds and a teddy bear for a card with it. Masked off all of the impressions with die cut masks. To keep the same layout for all three cards I used MISTI PRECISION STAMPER Stamping Tool ( SSS | AMZUS | MFT ).

В качестве панели для открыток я использовала кардсток размером 4 1/4 x 5 3/4 дюйма. В первую очередь простым карандашом очертила поля шириной 2 см и сделала оттиск луны, который сразу закрыла маской-вырубкой. Затем сделала оттиски остальных элементов - облаков и мишки на одной из панелей. Сделав оттиски, закрыла их все масками-вырубками. Только с помощью MISTI PRECISION STAMPER Stamping Tool ( SSS | AMZUS | MFT ) можно повторить сценку без изменений.Masking a Scene - Little Dreamers WPlus9


Using Micropore PAPER TAPE ( SSS ) I masked off the white area around the scene and blended two shades of blue Distress inks - TUMBLED GLASS ( SSS | AMZUS ) and BLUEPRINT SKETCH ( SSS | AMZUS ), applying more of the darker shade in the corners and around the masked off impressions.

Используя специальный скотч Micropore PAPER TAPE ( SSS ), я закрыла поля панелей и затонировала прямоугольник двумя оттенками Distress чернил - Tumbled Glass и Blueprint Sketch. Я более интенсивно нанесла Blueprint Sketch в углы и вокруг замаскированных оттисков.

Keeping all the masks in places dropped gold shimmer paint with a straw and heat set all spots with a heat gun. Removed the masks and coloured the Moon with a Copic marker.

Не снимая маски, накапала золотой краской с блеском и подсушила кляксы феном для эмбоссинга. Сняв маски, раскрасила луну и мишку маркерами Copic.
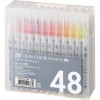
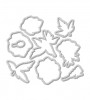
Bunnies and a teddy bear are also stamped in dye ink and coloured Copic markers. For additional dimension I adhered the creatures with two-layer foam tape.

Раскрашенные вырубки оттисков фигурок я посадила на два слоя вспененного скотча.Masking a Scene - Stardust WPlus9
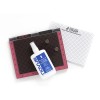
For a card with a teddy-bear I decided to add super sparkling glitter to the cloud. My favourite way of glueing glitter is to use Bond powder. It needs no time to dry, creates an even adhesive layer, and I make less mess working with it than with any glue. For this card I used a sentiment from Stardust stamps set.

Я использую глиттер круглый год и решила добавить его на облако с мишкой. Мне больше всего нравится "сажать" глиттер на порошковый Bond  - это пудра, которая наносится на чернила для эмбоссинга, разогревается феном и превращается в клей. Этот способ быстрее, не требует времени для высыхания и дает ровную клейкую поверхность. И самой замечательное - Bond аккуратнее в применении, чем любой жидкий клей.Masking a Scene - Stardust WPlus9
And this card with a bunny on the cloud I share only here in my blog, will not post it at my Instagram.

А эту открытку с зайкой на облаке я показываю только здесь в блоге, в Инстаграме я не буду её показывать.Masking a Scene - Little Dreamers WPlus9
If you missed my first set of cards with these stamps by WPlus9, click this link.
Если вы пропустили первый набор открыток с этими штампами от WPlus9, переходите по этому линку.

Thanks for stopping by! Have a nice start of the week!
Спасибо, что заглянули! Желаю всем отличного начала недели!
post signature

Supplies Used

Compensated affiliate links used. I personally have bought all the below displayed products. This post was not paid or sponsored. 

Click on the icons below to go to your preferred online store. If you buy any of these products following my link, I will receive a small commission at no cost for you. 

I am grateful to you, if you help me running this blog.

Friday, June 16, 2017

CAS Watercolor | Guest Designer | Reminder

Hello Everyone!
Всем привет!
Today a quick reminder post for CAS Watercolour June Challenge, where I am happy to be a Guest Designer. The theme this month is Summer.
Сегодня - очень короткий пост-напоминание про июньский конкурс в чб CAS Watercolour, где я один из Приглашенных Дизайнеров. Тема в этом месяце - Лето.
Look forward to seeing you creations. Thanks for stopping by. Enjoy your day!

С большим интересом жду ваших работ! Спасибо, что заглянули. Желаю всем прекрасного дня!
post signature

Friday, June 2, 2017

CAS Watercolor | Guest Designer

Hello Everyone!
Всем привет!
Today I am very glad to join the CAS Watercolour blog as a Guest Designer for June.

Сегодня я очень рада принять приглашение чб CAS Watercolour и присоединиться в качестве Приглашенного Дизайнера в июне!
This month we are celebrating a new Summer season and this challenge is dedicated to Summer.

К нам пришло Лето, и мы посвящаем свои работы новому времени года.
I must confess, I cannot watercolour. But I know how to imitate watercolouring. I started with stamping flowers from Modern Anemones stamp set by WPlus9 down to a piece of watercolour paper. Then coloured them with Gansai Tambi watercolours, layer by layer adding more pigment.
Я должна признаться, я не умею работать с акварелью. Но я знаю, как это скрыть. Для начала я сделала оттиски цветов из нового релиза американской компании WPlus9 на акварельной бумаге архивными чернилами. Затем слоем за слоем в моем любимом стиле тяп-ляп раскрасила их акварелью Gansai Tambi.
When the panel dried, I cut it in four stripes to make four cards at once. To create a white panel I stamped down the sentiment from the same set and a single flower. The flower is stamped repeatedly in embossing ink and heat embossed with clear powder to add some texture. Then using the matching die I partially die cut the flower and trimmed edges on both sides of the flower.

Когда панель высохла, разрезала её на четыре полоски, чтобы сделать сразу четыре открытки. Для создания белой панели я сделала оттиск надписи и крупного цветка из того же набора Modern Anemones. Цветок повторно отштамповала чернилами для эмбоссинга и запекла с прозрачной пудрой. С помощью координирующего ножа сделала частичную вырубку цветка и обрезала ножом края.
To assemble the card I glued the watercoloured stripe down to a soft grey card base and adhered the white panel with pieces of a foam tape. To bind visually both panels I used gold watercolour for flowers centers.

Последний шаг - сборка открытки. Акварельную полосу приклеила клеем на заготовку для открытки из светло-серого кардстока, а белую панель на вспененный скотч. Чтобы визуально связать обе полоски, добавила золотую акварель в сердцевины цветов.
Look forward to seeing you creations. Thanks for stopping by. Enjoy your day!

С большим интересом жду ваших работ! Спасибо, что заглянули. Желаю всем прекрасного дня!
post signature