This is a really fast way to create a landscape setting for a focal image on the card.
Hello Everybody!

Hello Everybody!
For a card maker loving stamping and colouring adorable critters images, creating a landscape setting for an image to finish a card can be difficult.
With so much time and effort put into colouring an image it is often complicated to make a setting rapidly and neatly.
To help you complete your critters' cards nicely I am demonstrating a creative use of Partial Die Cutting Technique and patterned papers.
Yesterday I got my hands on this charming stamps set - Simon Says Stamp BUNNY WISHES ( SSS ) which is a part of the Fresh Bloom exclusive release.
I have ordered this set of stamps as a bundle to have the matching dies too. The set contains four big bunnies images and many phrase builders for Spring occasions, Easter and Baby welcoming.
The image is stamped with the Memento Black Ink ( SSS ) directly onto a vertical card note and coloured with the Copic Sketch markers.
To create a green hill I partially die cut the bunnies, then inserted a circle die under the partial die cut and ran it through my Big Shot.
HERE you can watch my Youtube tutorial about making sandwiches for partial die cutting.
I trimmed a sheet of the green paper from the Lawn Fawn Paper Pack( SSS ) down to the size of my card - 4 1/4" by 5 3/8". This paper pad was included in the March Card Kit by Simon Says Stamp. I think I will be using it often, because it makes the perfect background for adorable images.
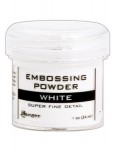
The phrase builder Have An Egg-cellent is heat embossed with the Ranger SUPER FINE WHITE Embossing Powder ( SSS ) onto a stripe of the black card stock, and Easter is stamped directly onto the patterned paper in black ink.
The sentiment stripe is popped up with a foam tape.
The sentiment stripe is popped up with a foam tape.
To assemble my card I opened it, inserted the green patterned paper, applied the glue to the reverse side of the card front and closed the card.
Supplies Used
You can help me running this blog, if you use for shopping my links.
Some links are compensated affiliate links.
Some links are compensated affiliate links.
Click on the icons below to go to your preferred online store. If you buy any of these products following my link, I will receive a small commission at no cost for you.
Would you like to see more Easter cards, please click the pictures below and hop directly to the respective posts.
I thank you for stopping by and leaving a comment or a question to this post! I appreciate if you subscribe as a follower to my blog. Let me know you came by and I will return you the favour.
|
Would you like to see more Easter cards, please click the pictures below and hop directly to the respective posts.
I thank you for stopping by and leaving a comment or a question to this post! I appreciate if you subscribe as a follower to my blog. Let me know you came by and I will return you the favour.


Love your card! What Copic colors did you use for coloring the bunnies in the card?
ReplyDelete